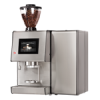
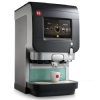
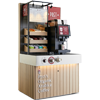
Espresso Omni XL
Weekly cleaning
Wear protective equipment (gloves & protective glasses), if you are using cleaning agents.
Wash you hands thoroughly before opening a new pack of ingredients.
Step 1
Prepare a sanitizing solution according to the instructions of your locally approved sanitizing product. For instance:
- Fill a container with hot water
- Add a sanitizing tablet for each 2 litres of water
Step 2
Insert the key in the keyhole and turn it 90 degrees clockwise to open the door.
Insert the yellow key and turn 90 degrees
WARNING! This will reactivate the functions that, by opening the door, were disconnected for safety reasons
Step 3
Lift the lever to release the lock, then pull and turn the cup stacker and dispensing compartment out of the machine.
Remove the cover from the cup stacker.
Carefully, top up all cup columns.
Place the cover back onto the cup stacker.
Step 4
Open the lid of the bean container.
Push it up until the notch on top of the lid clicks into the slot, so the lid stays open.
Top up the coffee beans.
Step 5
Close all outlet shutters of the instant ingredient canisters, by lifting them.
Lift each canister by its handle, pull out and place them on a table, with the outlet over the edge.
Open the lid of each container that needs to be topped up and push it up until the notch, on top of the lid, clicks into the slot, so the lid stays open.
Top up the ingredients, close the lids and clean the exterior of all canisters with a moist cloth.
Step 6
Slightly lift the drain gutter under the mixing bowls out of the drain tube, and remove it.
Pull and remove all drink hoses from the instant product mixing bowls.
Remove the heads from all the mixing bowls.
Turn the green ring anticlockwise to unlock, and pull out all mixing bowls.
Remove the mixer fin plates.
Step 7
Remove the coffee dispensing outlet from the dispense support.
Remove the hoses out of the support comb.
Lift the retaining clip of the dispensing outlets to unlock it, them move it away from the base. Remove all dispensing hose outlets from the support.
Step 8
Rinse all parts.
Step 9
Remove the coffee hose from the hook on the blue cover of the brewer unit. Disconnect it from the brewer by turning the green coffee outlet nozzle 90 degrees counterclockwise.
Step 10
Rinse all mixing bowl parts, mixing fin plates, drink hoses and the nozzle support, then dip them in the sanitizing solution.
Let it soak for at least 20 minutes, but no longer then 12 hours.
Step 11
Move the waste coffee chute to the right to unlock and remove it from the brewer.
Slightly lift the brewer unit cover and remove it.
Rotate the green lever, on each side of the brewer, counter clockwise to unlock it. Hold the brewer with both hands to pull and remove the brewer.
Step 12
Rinse the brewer with cold water, and remove coffee residue with a brush. Make sure the spring stays in place. Place it in a drying rack.
Rinse and clean the coffee waste funnel and the blue brewer cover under a running tap.
Step 13
Clean the backplates where the brewer and mixing bowls are attached, with a brush and a moist cloth.
Step 14
Push the coffee waste funnel back onto its rails at the bottom side of the brewer, until it clicks in place.
Place the clean and dry brewer unit with its holes back onto the pins on the backplate.
Rotate the green levers on the sides the brewer unit clockwise around the brewer unit, and make sure you lock it in place.
Place the blue cover of brewer unit back in place, by inserting the hooks into the holes in the backplate, and lower it.
Place the green nozzle of the coffee drink tube back onto the brewer unit, and turn it 90 degrees clockwise to lock it securely.
Place the hose back into its support on the blue brewing unit cover.
Step 15
Finally wash all parts with a brush, and rinse them with clean water.
Let parts dry completely, or dry all parts with a clean tea towel.
Reassemble the mixing bowls.
Place the splash guard onto the water conveyor and place the powder funnel on top.
Step 16
Turn each mixing bowl driveshafts until the flat part is on top. Place each mixing fin plate with its symbol accordingly.
Place each mixing bowl back into the backplate, making sure the ventilation hole and the water outlet are in place. Lock it in position by turning the green ring clockwise, until it points straight downwards.
Step 17
Slide the dispensing nozzle support back onto its stand, raise the clip and push until it clicks to its locked position.
Insert all hose nozzles back into the nozzle support.
Step 18
Place the clean drain gutter outlet, under the mixing bowls, into the drain tube, and hang it with its hooks in the holes in the back plate. Make all hoses lay in its recess in the edge of the gutter.
Attach the hoses A, B, C and D back onto the outlets of the mixing bowls.
Step 19
Clean the canister table with a moist cloth
Place all canisters back onto the canister table.
Push the canister outlets down to reopen them. Make sure they all tubes end in its recess in the edge of the canister table.
Step 20
On the touchscreen, touch the ‘OmniLine’ logo to open the ‘Operator menu. Enter the pin code.
Press ‘’Menu’, then ‘Favorites’ for the rinsing, press ‘Rinse and clean’, then choose ‘Complete cleaning’, and confirm with OK.
WARNING
Hot water will pour out of all drink outlets. Make sure the waste water container is on its place.
Step 21
While the rinsing process is ongoing:
On top of the rinsing compartment, slacken the knurl holding the cup chute, lift the locking clip, and remove the cup chute.
Remove the drain gutter under the dispensing compartment: pull both ends out of the pivoting pins.
On the backside of the dispensing compartment, press the retaining clip holding the drip tray, and remove the drip tray.
Step 22
Clean the interior of the machine with a moist cloth.
Step 23
As soon as the rinsing program has finished, remove the waste bucket, and empty it.
Clean the bucket, cup chute, drain gutter and drip tray under running water with a brush. Dry them with a clean, dry tea towel.
Step 24
Use a moist cloth clean the dispensing compartment and place the drip tray back. Make sure the notches enter the recesses, and the retaining clip locks the drip tray.
Step 25
Place the cup chute back onto the backside of the dispensing compartment. Make sure the rails slide into its slots on the left, right and backside, until its lock is in place. Tighten the knurl.
Use both hands to hang the drain gutter back under the dispensing compartment, onto its pivoting pins. Check if it pivots easily.
Step 26
Remove the trash bag funnel, on the bottom of the splash guard of the brewing unit, by pulling it out of its bracket.
Press the clip to remove the ring and remove the trash bag from the funnel.
Clean the funnel.
Step 27
Clean the floor of the machine with a moist cloth.
Attach a new trash bag to the funnel with the retaining clip. Place it back in its bracket. Make sure the trash bag reaches the floor of the machine.
Step 28
Place the waste-water bucket back in its place.
Clean the float with a moist cloth.
Clean the drip gutter of the dispenser outlets with a moist cloth.
Step 29
Turn and push the cup stacker back into the machine until it clicks into its locking mechanism.
Step 30
Remove the yellow key.
Close the door, remove the key and clean the door with a moist cloth. The machine will start up!


