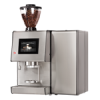
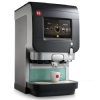
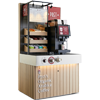
Schaerer Soul
Weekly cleaning
Step 1
Touch the top left corner of the touchscreen to activate the sprocket icon button. Press it to open the service / cleaning / maintenance menu.
If necessary, touch the [Operator] button to choose an operator profile. Enter the pin code. Then press [Cleaning] and confirm by pressing the green ‘play’ icon.
Step 2
Pull to remove the coffee waste bin out of the machine. Empty the coffee waste bin and clean it with water, a household detergent and a brush.
Step 3
Release the brewer unit by pulling the lever on the bottom of the unit, then lower it as far as possible.
Carefully pull it out of the machine while tilting it backwards.
Step 4
Use the multi-tool to turn the spindle of the brewing unit counter-clockwise all the way.
Step 5
Clean the brewer unit under lukewarm running water, use a brush. Slightly lift the drop-in slide away to reach the sieve.
Shake off access water and let it dry completely.
Step 6
Use the multi-tool to turn the spindle clockwise to the stop, then turn it ¼ tun back / counter clockwise from the stop.
Step 7
Clean the brewer compartment with a moist cloth.
Place the brewer back in the brewer compartment. Lift it up to lock it.
Make sure the brewer unit is securely locked in its position.
Step 8
Unlock the touchscreen panel and slide it upwards until it locks.
Pull the mixer unit out of the machine.
Pull the mixer fin plate to detach it from the driveshaft.
Clean the mixer compartment and the mixer mount / backplate with a brush and a moist cloth.
Step 9
Disassemble and the mixer unit.
Clean all parts of the mixer unit, including the mixer fin plate, with clean water and a brush.
Step 10
Turn the mixer driveshaft until its flattened part is up. Hold the mixer fin plate with the arrow on top and push it over the driveshaft.
Step 11
Reassemble the mixer unit and place it back onto its mount in the machine.
Step 12
Lift the touchscreen panel to unlock, then lower it and slide down until it locks.
Step 13
Press the ribbed button on the outlet cover, and push the cover down to release.
Clean the dispensing outlets with a brush.
Step 14
Place the coffee waste bin back into the machine.
Step 15
Insert a coffee system cleaning tablet into the slot on top of the middle coffee bean container.
Step 16
Open the refrigerator and remove the milk container or milk packages.
Step 17
Place a suitable ‘milkpure’ circuit cleaner tablet in the cleaning container and close the lid.
Place the cleaning container in the refrigerator and attach the milk hose to the lid. Leave the door of the refrigerator open!
Step 18
On the touchscreen, confirm that the cleaning container has been inserted and the cleaning tablet has been added by touching the green ‘play’ icon.
Step 19
WARNING!
Hot water runs through the machine and the hoses.
Step 20
Top up the ingredient containers. Take care not to overfill them across the maximum level sign.
Step 21
Clean the drink outlet cover with a brush under a running tap.
Wear dishwashing hand gloves. Clean the milk container and the milk suction tube with water and a detergent.
Step 22
Detach the milk hose from the cleaning container, and take the cleaning container out of the refrigerator.
Empty and rinse the cleaning container.
Step 23
Clean the interior of the refrigerator with a moist cloth.
Step 24
Place the milk container or milk packages back into the refrigerator, reattach the milk hoses. Close the refrigerator door.
Step 25
Remove the drip rack, wipe the tray and clean all parts with a brush under running water.
Place back the rack.
Step 26
Remove the drain tray under the refrigerator and empty it in the sink clean it with clean water and a brush.
Place the refrigerator drain tray back.


