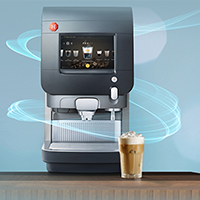
Schaerer Soul
Descaling
Wear gloves and a safety goggle.
Do not touch the descaling product during process, or with bare hands.
Do not reach under the steam wand during process.
Step 1
Fill the cleaning container with exactly 1 L water. Remove the drip grid from the drip tray and have your timer ready.
Step 2
Empty 1 L of water in the drip tray and start the timer at the same time. Check if the water drains completely within 30 seconds.
Step 3
WARNING
If the 1 litre of water took more than 30 seconds to drain, the drain tray will overflow during the decalcification process, causing serious damage.
Pour hot water into drain to improve drain flow and repeat STEP 2. If the fault persists, do not proceed with the decalcification process, but contact your Service provider.
Step 4
Touch the top left corner of the touchscreen to activate the sprocket icon button. Press it to open the service / cleaning / maintenance menu.
Step 5
Select ‘Maintenance’, the maintenance window appears.
Unpack the decalcification cartridge and press > ‘Play’ icon on the touchscreen.
Step 6
Pull to remove the coffee waste bin out of the machine. Empty the coffee waste bin and clean it with water, a household detergent, and a brush
Step 7
Remove the front cover on the left and remove the green end cap by turning it counterclockwise.
Position the freshly-unpacked decalcification cartridge under an angle of 45 degrees and insert it. Lock it by turning it clockwise.
Step 8
Place the coffee waste bin back into the machine.
Step 9
Open the refrigerator and remove the milk container or milk packages. Dispose remaining milk or place the milk in a refrigerator during the decalcification process.
Step 10
Place the cleaning container in the refrigerator and attach the milk hose to the lid. Leave the door of the refrigerator open!
Step 11
Once the descaling process is complete, remove the decalcification cartridge.
Replace the green safety cap and close the front cover.
Press the > ‘Play’ icon on the touchscreen to continue.
Step 12
Detach the milk hose from the cleaning container, and take the cleaning container out of the refrigerator.
Empty and rinse the cleaning container.
Step 13
Clean the interior of the refrigerator with a moist cloth.
Step 14
Place the cooled milk container or milk packages back into the refrigerator, reattach the milk hoses. Close the refrigerator door.
Step 15
Order a new decalcification cartridge for the next descaling process.
Press the > ‘Play’ icon on the touchscreen to continue.


